Arduino GSM Shield

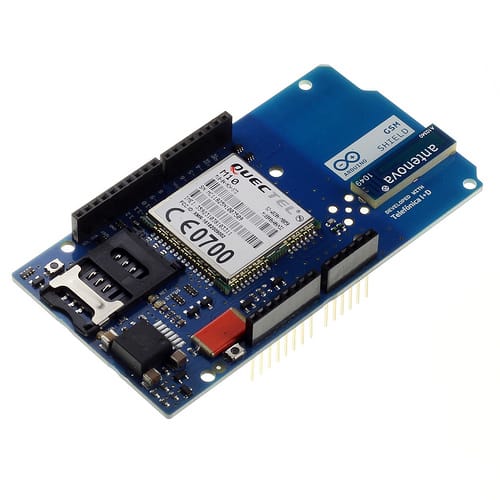
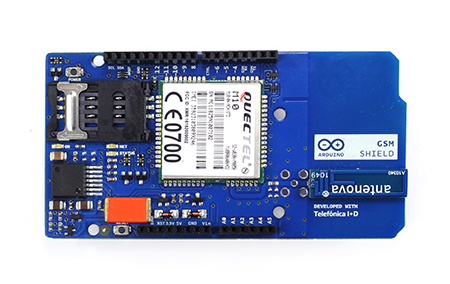 Resmi olarak Arduino GSM Shield kullanıma sunuldu. Arduinoya bağladığınızda GPRS kullanarak internete bağlı şey(!)ler yapmak artık daha kolay ve standart yoldan sağlanmış oldu. Basit bir kaç kontrol kodu ile internete bağlanarak verileri okuyup yazabilirsiniz, hatta sesli çağrıları da cevaplayıp, sesli arama da yapabilirsiniz.
Eklenti +5v ile çalıştığında direk arduino üzerine bindirerek kullanabileceğiniz gibi ufak değişikliklerle arduino Mega, Mega ADK ve Leonardo ile de çalışabilmekte, kötü haber ise şu anda Arduino Due desteği yok.
Kullanım için Arduino IDE 1.0.4 ve sonrasını kullanmanız gerekiyor. GSM kütüphanesi de şurada
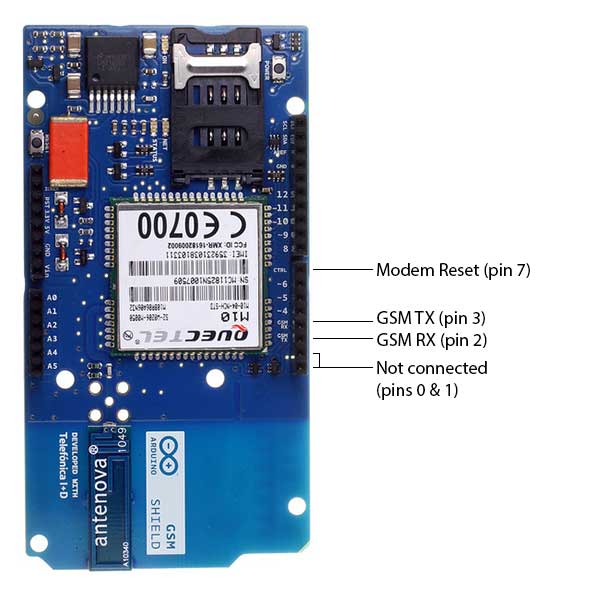
İnternete bağlanmak için kullanılan program örneği şu şekilde
// include the GSM library
#include <GSM.h>
// PIN number if necessary
#define PINNUMBER “”
// APN information obrained from your network provider
#define GPRS_APN “GPRS_APN” // replace with your GPRS APN
#define GPRS_LOGIN “login” // replace with your GPRS login
#define GPRS_PASSWORD “password” // replace with your GPRS password
// initialize the library instances
GSMClient client;
GPRS gprs;
GSM gsmAccess;
// This example downloads the URL “http://arduino.cc/latest.txt”
char server[] = “arduino.cc”; // the base URL
char path[] = “/latest.txt”; // the path
int port = 80; // the port, 80 for HTTP
void setup()
{
// initialize serial communications
Serial.begin(9600);
Serial.println(“Starting Arduino web client.”);
// connection state
boolean notConnected = true;
// Start GSM shield
// pass the PIN of your SIM as a parameter of gsmAccess.begin()
while(notConnected)
{
if((gsmAccess.begin(PINNUMBER)==GSM_READY) &
(gprs.attachGPRS(GPRS_APN, GPRS_LOGIN, GPRS_PASSWORD)==GPRS_READY))
notConnected = false;
else
{
Serial.println(“Not connected”);
delay(1000);
}
}
Serial.println(“connecting…”);
// if you get a connection, report back via serial:
if (client.connect(server, port))
{
Serial.println(“connected”);
// Make a HTTP request:
client.print(“GET “);
client.print(path);
client.println(” HTTP/1.0″);
client.println();
}
else
{
// if you didn’t get a connection to the server:
Serial.println(“connection failed”);
}
}
void loop()
{
// if there are incoming bytes available
// from the server, read them and print them:
if (client.available())
{
char c = client.read();
Serial.print(c);
}
// if the server’s disconnected, stop the client:
if (!client.available() && !client.connected())
{
Serial.println();
Serial.println(“disconnecting.”);
client.stop();
// do nothing forevermore:
for(;;)
;
}
}
GSM Shield eklentisini ve Arduinoyu USB yerine 2A lik bir kaynaktan beslemek gerekiyor normal şartlarda 700mA çekmesine rağmen TX yaparken 2A pik akımlar çekebilmekte.
Resimleri ve içeriği Arduino.cc den aldık, ilgili sayfalar;
Arduino GSM Shield
GSM Kütüphanesi
GSM Shield kullanım
ÖNEMLİ NOT: Ürünü postayla Türkiyeye getirecekseniz bir pasaportla TK ya kayıt ettirmenz gerekli. Resmi ithalatla getirenlerden onaylı olup olmadığını sorun mutlaka…